Why code sandbox to develop this app.
This is beginner friendly web application to make so code sandbox solves the problem of creating environment which is required for react framework.
We can call code sandbox; vscode on the cloud.
code sandbox is very easy to use mainly for beginners like me. we can share the direct link of code to someone or if we want to do collaboration work in small teams then it is very easy to use.
also it is online so we can directly link this to our GitHub repository, fork repository any time to make changes without changing actual code that's why I am using code sandbox here.
let's start
before writing anything first understand that we are writing code in .js file instead of .html file because we are using javascript this is same as html but in our workplace that is in app.js jsx has an important role it converts html into js.
We can use jsx as a template. in this app I have used embedding in javascript everytime whenever I wanted to prepare result to display on screen using setter function. I will explain that later but first we will see the example of embedding.
  import React from "react";
  const userName = "Abijeet
  export default function App() {
  return (
  <div className="App">
    <h1>Welcome {userName}</h1>
  </div>
  );
}
output: Welcome Abhijeet
similarly, we can use CSS properties in react using double parentheses ex. style={{}}. so this was the basic syntax which was different from normal HTML and css otherwise everything is almost the same.
Making button which is clickable
Syntex for the button is the same as in HTML but to make button clickable we are going to use onclick event here first we will see the syntax.
<button onClick={clickEventHandler}>Click Here </button>
this is syntex for button in react. here we are using onclick event rather than using .addEventListner() which we use in-plane javascript. here clickEventHandler is a function so we need to make a function with that name to proceed further otherwise we will get an error.
but till now whatever we are getting as an output we are getting it in the console. now we want to show output on the screen. so now we are using the setter function and useState hook from react.
Update result on view/screen.
setter function and useState.
const [variable, setvariable]=useState(" ")
setter function is used to rerender code again. If we use a normal/single function without a set we cant render code again after one cycle. so we call setter function is the function that returns a function.
In the above syntax, the variable function gets the value setvariable function before that it has the default value which is given in usestate("").
use variable to show output on UI ex. {varible}
Handling the data from the input element
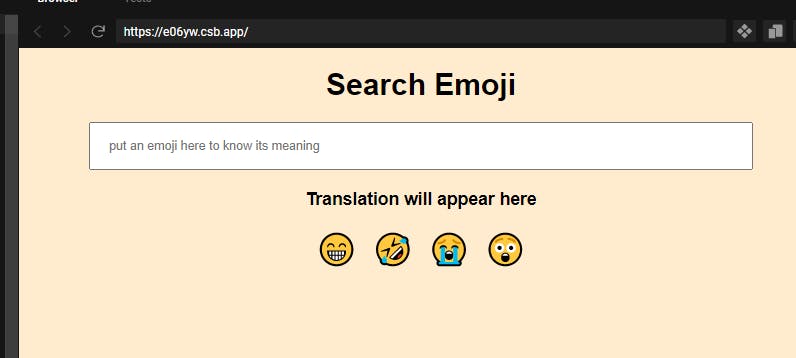
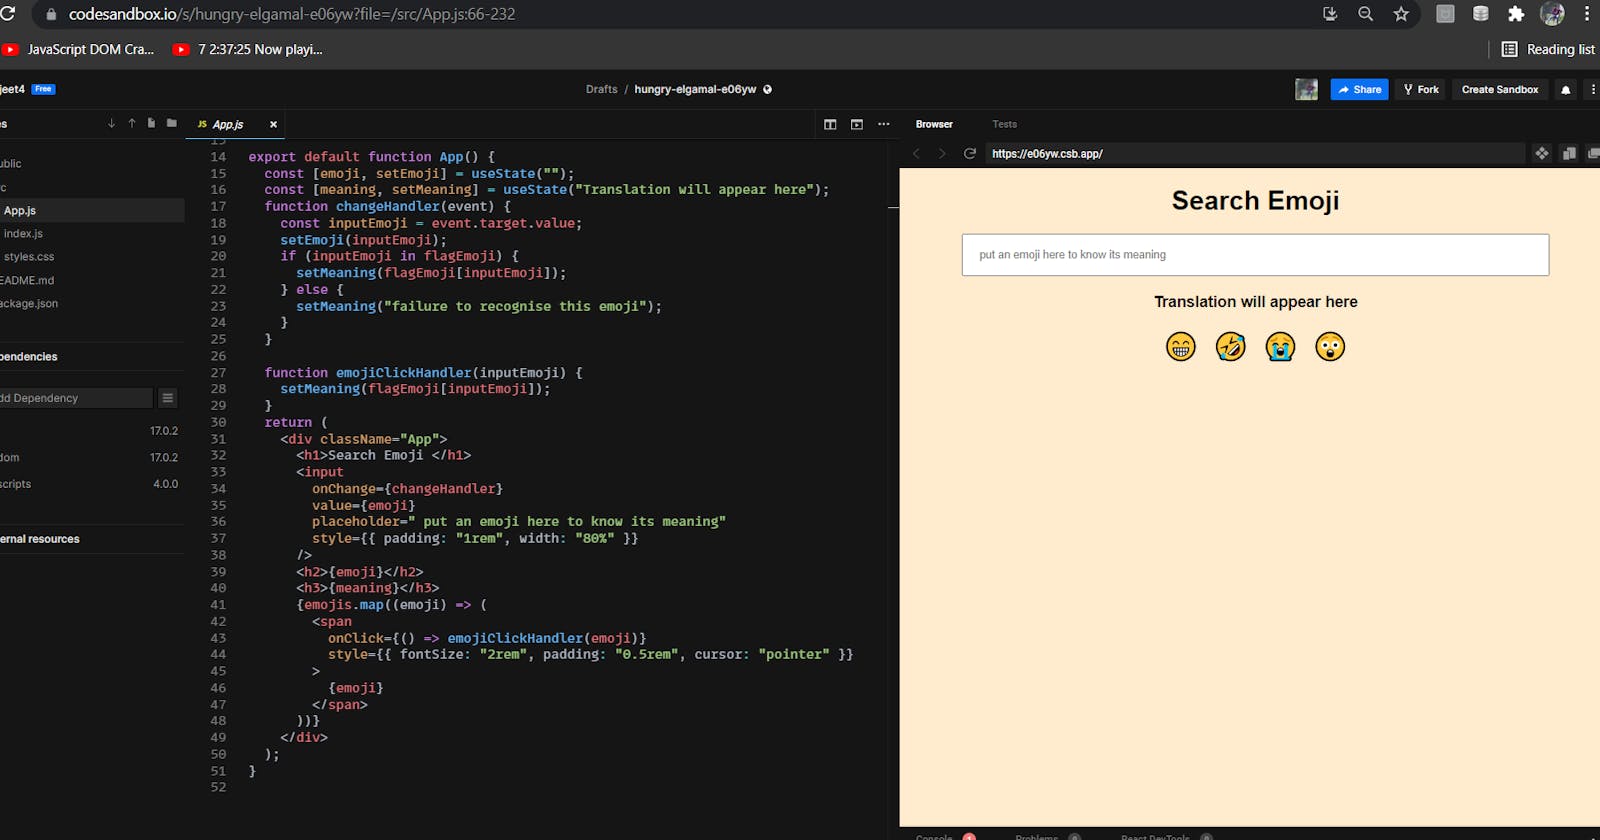
 This is our final app. in this we have to give emoji as input and it will give us the meaning of emoji.
so we have to write code to process input data. to use input element put onChange event.
<input onchange={inputElementHandler}/>
make new function inputEventHandler pass parameter event from that now we are going to use target.value to take input and store in variable.
  function inputElementHandler(event){
  const input = event.target.value;
  setOutput(input)
  }
and the last update the value using useState.
showing meaning to the user
now input and output are done now we have to write code for processing. to do processing we need data that has emoji and its meaning. to store that data we are using objects and that data will be in key, value pair because we are using setter usestate to render.
     const flagEmoji = {
     "😁": "Beaming Face with Smiling Eyes",
     "🤣": "Rolling on the Floor Laughing Face",
     "😭": "Loudly Crying Face",
     "😲": "Astonished Face"
      };
this is the data on which we are going to do the process.
converting object into an array
to handle data we are going to use .map function for that we need to convert objects into arrays because the map function doesn't traverse through objects.
const variable = Objects.keys(object)
now we have an array of objects now we can use the map function
  {
     variable.map((emoji)=>{
         return (
             <span onClick={()=>emojiClickHandler(emoji)}>{emoji}</span>
          )
      })
  }
By using this we can get keys on screen and also we can click on that to get the meaning of that particular emoji,
at last, we need to use the setter function once again to render meaning. setMeaning(object[input])
I have made this app in https://neog.camp/ level zero program. so thanks to Tanay Pratap for teaching these concepts.
